Organise your digitized documents before migrating them to the cloud
The shows briefly the whole process of how you input company data, check the stored records, open the filing tray window where you would be able to drop the file into specific folders. You would also be able to update, delete and export the data to a spreadsheet. All records will be stored in a sqlite3 database making data transfer very easy and hassle free.
Please click on the video above if it doesn’t start playing.
Step 1
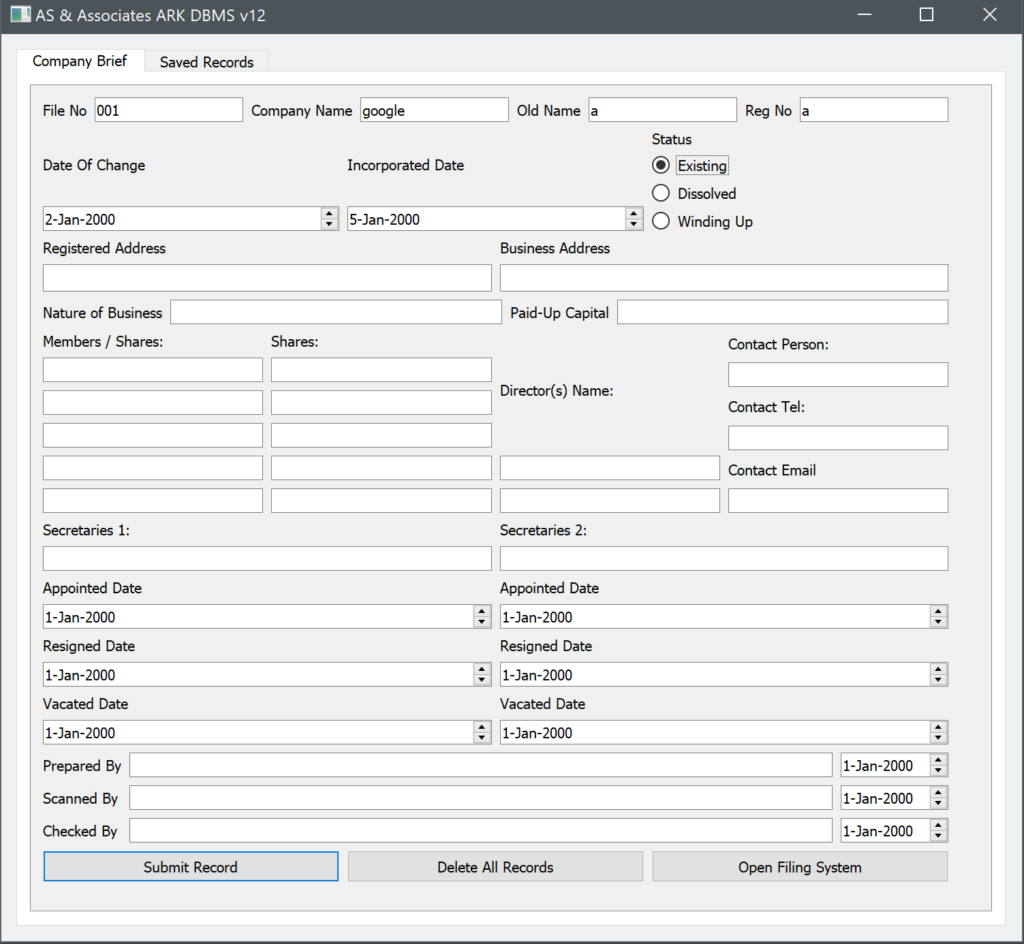
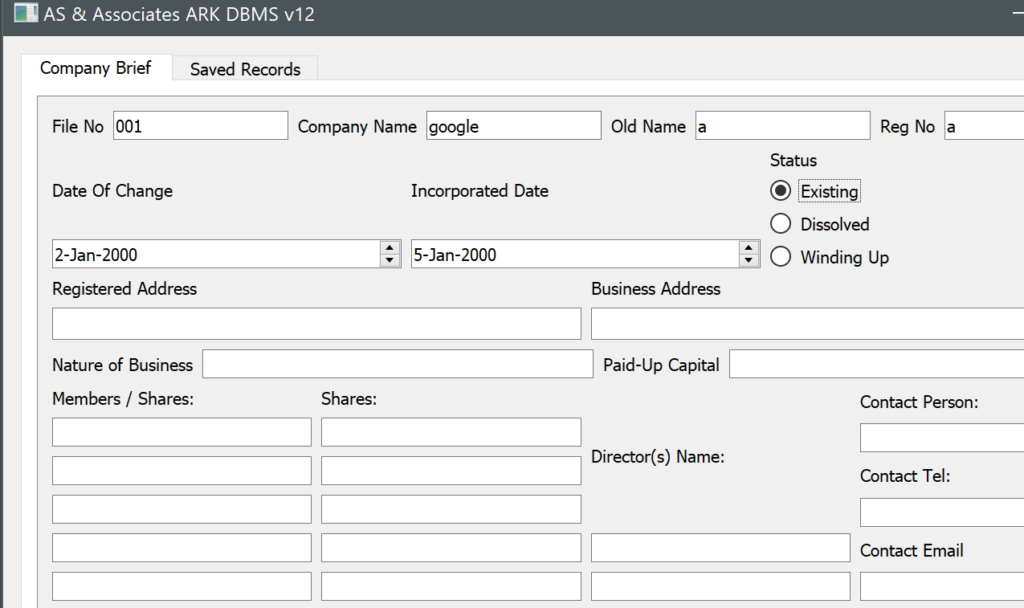
Enter the required data for each entity concerned.
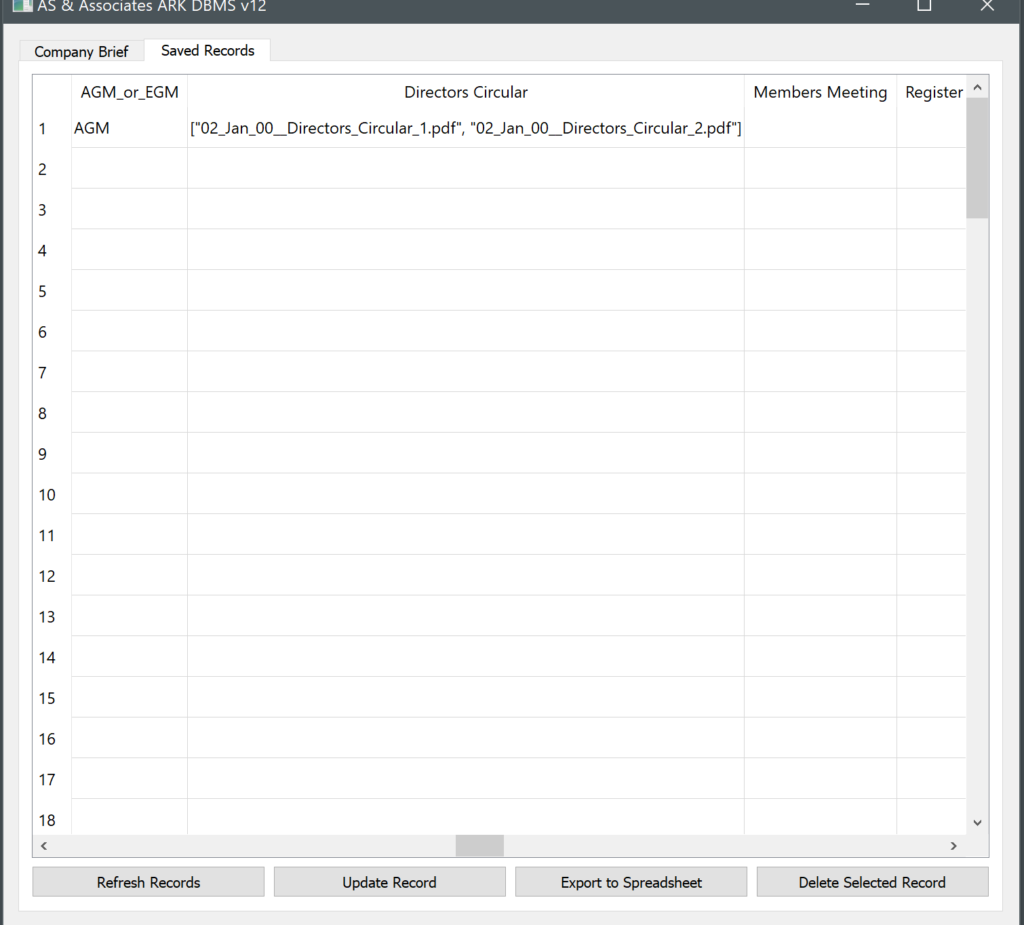
Step 2
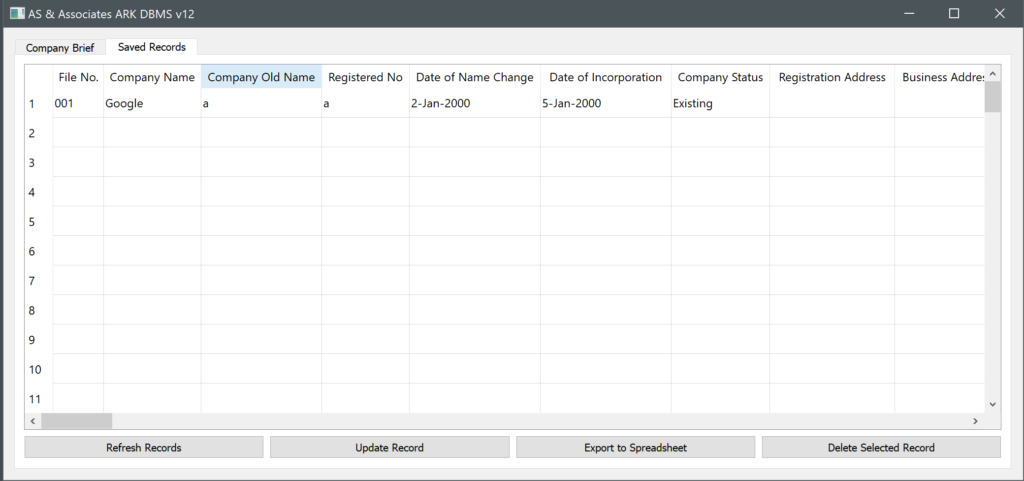
Viewer for all saved records for verification.
Step 3
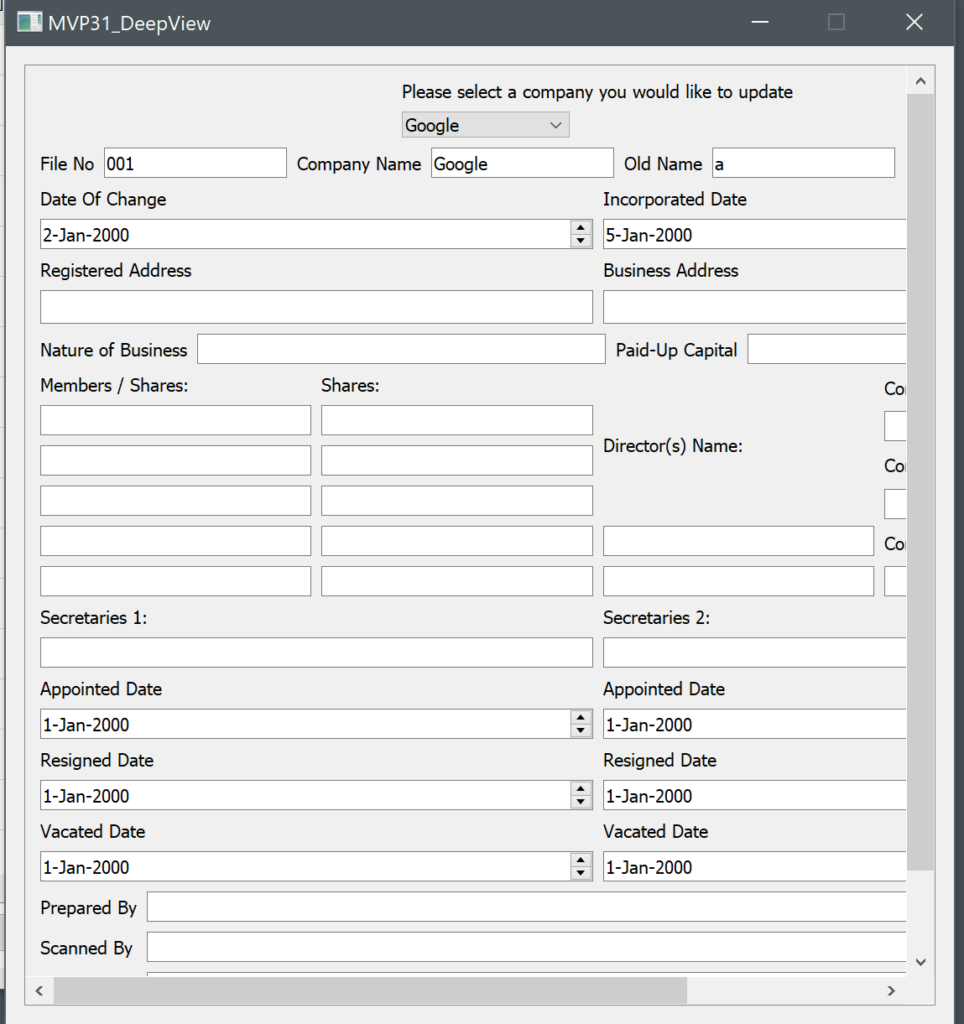
Window to update or edit data if necessary.
Step 4
48 separate folders generated automatically for file storage.
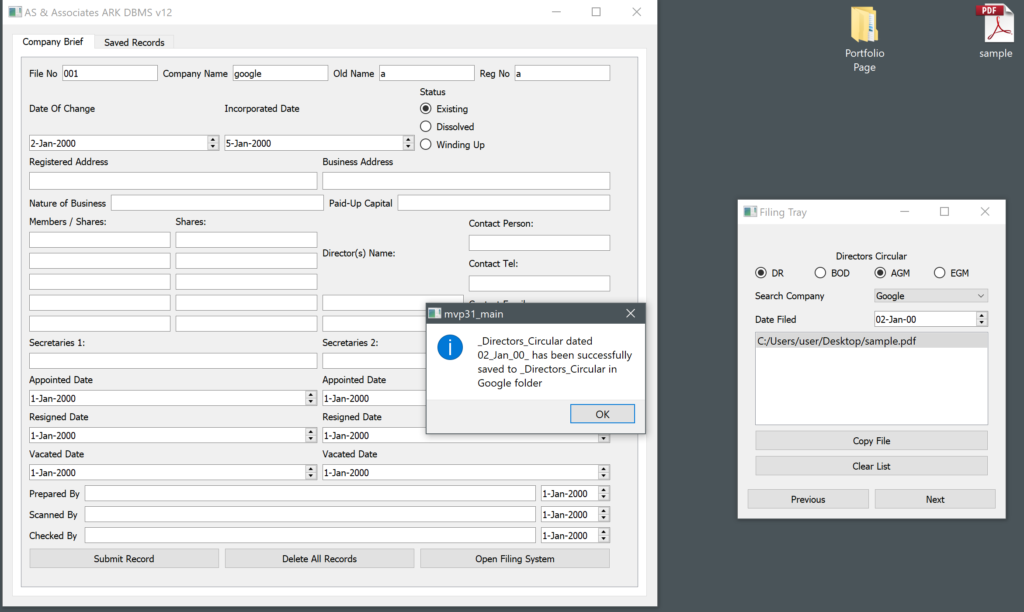
Step 1
This is the first and main window where data on any particular entity is entered, entities can be anything depending on the respective business, it can be a company, customer, product, an order and so on. There are certain fields which require strict validation in order to ensure the data entered fits required criteria and prevents duplications.
Step 1
This is a close up of an application used by Company Secretaries who are looking to convert all their physical client files into digital format before migrating them to the cloud so it can be accessed by employees working remotely and to ensure the data is stored safely for business continuation purposes.
Step 2
Here is a view of the second tab for Saved Records, here you would be able to see all the records that have been saved. From here you will have options to refresh records, update an existing record with new information or to correct previous entries, option to export all saved records to an Excel spreadsheet or any format of choice for sharing, safekeeping or to directly work on it.
Step 3
This is the update window where you are able to select any companies / entity already saved to be edited. The reason each action has been separated into its own window is so that all work on saved data would need to acted on deliberately and consciously, this is to reduce unwanted or accidental edits and changes to stored data.
Step 4
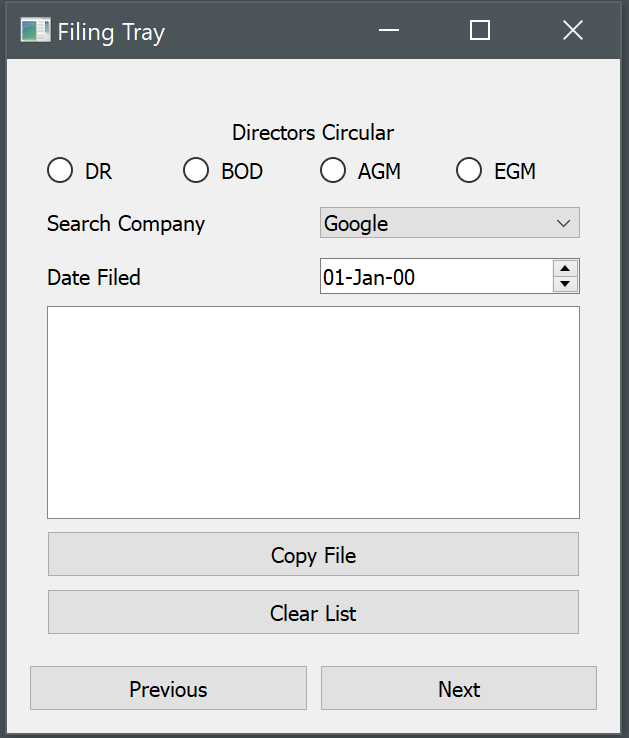
This is the filing tray which is a key function to the whole application, this window allows for the storing of files into its respective folders using a drag and drop function. Each file would require a date input before saving. In this particular application , there are 48 separate folders for each company to store 48 types of unique records for each company.
Step 5
Here you see the confirmation message presented after the saving action has been completed .
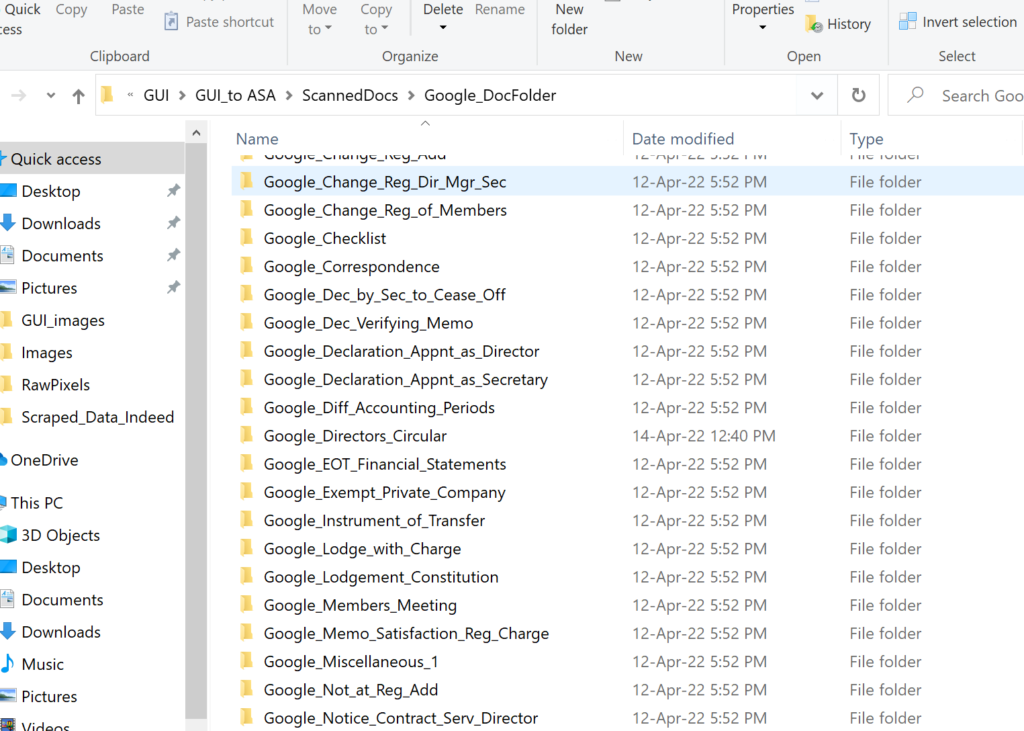
Step 6
Here you see all the 48 folders with the respective company’s name automatically generated once the company data has been entered at Step 1, all files saved using the Filing Tray will be stored in their respective folders which is the primary function of this application.
Step 7
Here you can see the file name and file date stored in the respective folder shown in the saved records. This function enables one to view what has been saved and the contents of each folder.